As someone who built a wall-mounted jewelry organizer from walnut and brass hooks as a shop project and watched it solve years of tangled-chain frustration, I learned what actually works from making it myself. Today, I will share it all with you — from materials to installation to the creative uses people don’t talk about enough.
Why Choose Wall Mounted Jewelry Organizers?
Floor space is precious in small rooms, and a wall-mounted organizer reclaims surface area that would otherwise disappear under jewelry pile-up on the dresser. That’s the practical case. But there’s an aesthetic argument too — a well-made wooden jewelry organizer becomes a display piece that shows off the jewelry rather than hiding it. Hooks for necklaces keep chains from tangling. Slots for rings keep them organized by type. Small holes or mesh sections for earrings make finding a matching pair take seconds instead of minutes. Visibility at eye level turns the morning routine from a frustrating search into a quick grab.
Aesthetic Appeal
Wall mounted organizers add character to a room in a way that a jewelry box in a drawer never can. They come in styles ranging from rustic wood to sleek powder-coated metal, and the better ones are genuinely customizable. When pieces are spread out rather than stacked on top of each other, each individual item stands out — it becomes functional art on the wall.
Materials and Design Options
Wood is the most natural fit for a shop-built jewelry organizer. Walnut gives you a rich dark tone that makes jewelry pop visually — I used 3/4-inch black walnut with a hand-rubbed oil finish on the one I built, and the brass hooks against the dark wood looked sharp. Bamboo is a good budget option with a contemporary look. Pine or poplar works fine if you plan to paint. For the mounting surface, you can use a solid wood panel, a frame with mesh backing for earrings, or a combination of both.
Metal options — powder-coated steel or wrought iron — offer a sleek modern or industrial look. Fabric elements like velvet backing prevent scratches on delicate pieces. Acrylic is a minimalist option, sometimes combined with LED accent lighting for a striking display effect.
Installation Considerations
Location matters before anything else. Avoid walls with direct sunlight exposure — UV will fade both the jewelry and the wood finish over time. Humidity is also a concern; a wall near a bathroom or exterior wall in a damp climate is not ideal for solid wood. Find a stud and hit it if at all possible. Jewelry feels light, but a fully loaded organizer with heavy necklaces and bracelets adds up fast, and a wall anchor in drywall alone is not something I’d trust for long-term use. Use appropriate hardware for your wall type — toggle bolts for drywall-only mounting, screws into studs or masonry anchors for solid walls.
Maintenance Tips
Dust is the main enemy. It accumulates on the wood and dulls the finish over time, and it settles on jewelry and makes it look dingy. A soft brush or microfiber cloth handles the organizer itself; a jewelry polishing cloth handles the pieces. Check the mounting hardware every six months or so — screws loosen gradually, especially if you’re frequently adding and removing heavy pieces. A slight tightening takes thirty seconds and keeps everything secure. Clean jewelry before hanging it back up after wearing — a quick wipe removes skin oils and lotions that tarnish metal over time.
Cost and Availability
Store-bought options run from $20 for simple metal hook boards to over $200 for custom wood pieces. Building your own lands you somewhere in between — materials for a solid walnut organizer might run $40-60 in lumber and hardware, and you get exactly the size and configuration you need. Online marketplaces and home goods stores carry a wide selection if you’d rather buy than build, but the shop-built version is genuinely more satisfying and usually better quality than anything in the same price range.
Creative Uses Beyond Jewelry
Probably should have included this earlier because it changes how you think about the project. A wall-mounted hook board doesn’t have to be just for jewelry. In an entryway, the same design holds keys and lanyards. In the kitchen, it keeps frequently-used utensils off the counter. The same basic construction — a solid wood mounting board with brass hooks — works for scarves, belts, or shop tools if you scale it up. Some people incorporate small shelves or a mirror into the same piece, which turns it into a full functional vignette rather than just a storage accessory.
Inspiration from DIY Projects
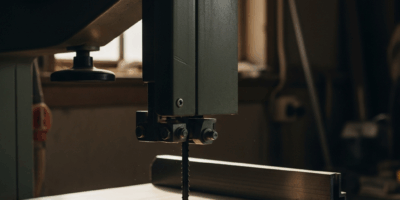
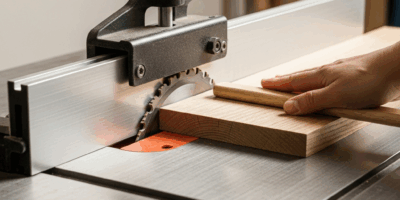
Building your own wall mounted jewelry organizer is a good afternoon project for intermediate woodworkers. Reclaimed wood works especially well here — a piece of barn siding or salvaged hardwood flooring has character that new lumber can’t match. Use a dado stack or router to cut channels for ring storage. Install brass cup hooks for necklaces. Add a router edge profile to soften the perimeter. Paint or stain to match the room’s decor, or go with a natural oil finish to let the wood speak for itself. The result is a functional piece with a story behind it — exactly the kind of thing that makes a room feel personal rather than furnished.
Jason Michael is the editor of The Workshop Journal. Articles on the site are researched, fact-checked, and reviewed by the editorial team before publication. Read our editorial standards or send a correction at the editorial policy page.


Stay in the loop
Get the latest the workshop journal updates delivered to your inbox.