Tool maintenance has gotten pushed to the back burner in most shops — there’s always a project that feels more urgent than cleaning blades and waxing tables. As someone who ignored maintenance for too long and paid for it with a rusted jointer bed and a router that started smoking, I learned these lessons the hard way. Today I’ll share what actually needs doing and how often.
This article includes affiliate links. We may earn a commission at no extra cost to you.
Tools that work hard deserve care in return. Regular maintenance extends tool life by decades, improves performance measurably, and prevents the frustrating failures that interrupt projects at critical moments.
Cast Iron Surface Care
Table saw tops, jointer beds, and bandsaw tables share a common enemy: rust. Even in climate-controlled shops, humidity fluctuations cause surface oxidation. Once rust establishes, it pits the surface permanently and those pits drag stock during cuts.
Prevention beats treatment. Apply paste wax to all cast iron surfaces monthly during humid seasons, quarterly otherwise. The wax creates a moisture barrier while providing lubricity that helps stock slide smoothly. SC Johnson Paste Wax or Butcher’s Wax both work well. Avoid automotive waxes with silicone, which can contaminate wood and affect finish adhesion.
For existing rust, remove it immediately. Light surface rust comes off with WD-40 and fine steel wool. Heavier rust requires rust remover chemicals or a Scotch-Brite General Purpose Hand Pad. After removal, wax immediately to prevent recurrence.
I’m apparently someone who learned this lesson by leaving a damp offcut sitting on my bandsaw table overnight. Never do this. The moisture transfers and initiates rust within hours in humid weather.
Blade and Bit Maintenance
Carbide-tipped blades and bits don’t need sharpening as frequently as high-speed steel, but they accumulate pitch and resin that affects cutting performance and puts more load on motors. Monthly cleaning keeps them cutting like new.
Soak blades in a pitch and resin remover — Simple Green or a dedicated blade cleaner like CMT Formula 2050 Blade and Bit Cleaner — for 15 minutes. Brush with a brass-bristle brush to remove softened buildup. Rinse with water and dry immediately to prevent surface rust. Apply a light coat of rust preventive before storage.
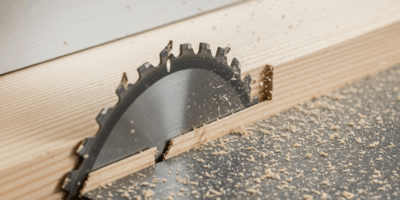
Inspect teeth during cleaning. Chipped carbide indicates contact with a metal fastener or misuse. One damaged tooth throws off the entire cut. Replace damaged blades or send them for professional sharpening and repair.
Router bits benefit from the same treatment. Accumulated resin on cutting edges increases friction, causes burning, and accelerates bearing wear. Clean bits after every significant project.
Bearing Inspection and Replacement
Sealed bearings in routers, sanders, and other high-speed tools eventually fail. Warning signs: increased noise, vibration, or heat during operation. Catch failing bearings early — a seized bearing destroys spindles and shafts.
Spin tool arbors by hand with power disconnected. They should rotate smoothly with no roughness, grinding, or play. Any irregularity warrants bearing replacement. Probably should have added this to the monthly routine earlier; it takes about 30 seconds per tool.
Table saw and jointer bearings are pressed onto precision shafts. Replacement requires proper tools and technique. If you’re not comfortable with the process, a professional rebuild costs far less than shaft replacement after a seized bearing causes damage.
Lubrication Points
Table saw elevation and tilt mechanisms run on worm gears that need lubrication. WD-40 Specialist White Lithium Grease Spray applied annually keeps them operating smoothly. Avoid petroleum-based oils that attract sawdust and create grinding paste.
Drill press quill and table mechanisms need occasional lubrication. Light machine oil on the quill return spring, white grease on the table lock mechanism and height adjustment rack.
Jointer and planer cutter head bearings are often sealed-for-life, but check your manual. Some older machines have grease fittings requiring periodic lubrication.
Alignment Verification
Accurate tools require accurate alignment. Over time, vibration and use shift settings away from factory specifications. Check critical alignments quarterly:
Table saw: blade parallel to miter slot within 0.002″ over the length of the blade. Fence parallel to blade within 0.002″ at front and back.
Jointer: outfeed table level with cutter head apex. Fence square to table when set at 90 degrees.
Bandsaw: wheels coplanar. Guides properly positioned. Table square to blade.
Drill press: table square to spindle. Chuck runout within 0.002″.
Cord and Switch Inspection
Power cords take abuse. Inspect monthly for cuts, kinks, and heat damage near the plug and tool entry points. Replace damaged cords completely — never splice power tool cords, and electrical tape over damaged insulation is a temporary fix that becomes a permanent hazard.
Switches fail gradually, starting with intermittent operation. If a tool sometimes doesn’t start on the first press, replace the switch before it fails completely during a cut.
The Maintenance Mindset
Maintenance isn’t lost shop time — it’s invested shop time. Every hour spent cleaning, adjusting, and protecting tools returns multiple hours of reliable performance. The well-maintained tool cuts better, lasts longer, and never leaves you stranded mid-project.
Build maintenance into your routine. Wipe down surfaces at session end. Clean blades after significant projects. Check alignments before critical cuts. Small, consistent maintenance prevents the catastrophic failures that result from neglect.


Stay in the loop
Get the latest the workshop journal updates delivered to your inbox.