“`html
What Blade Tracking Really Means and Why It Matters
Bandsaw blade tracking off has gotten complicated with all the confusion flying around. Basically, it’s when your blade doesn’t run centered on the wheel—it drifts toward the front or back edge instead. In essence, that’s what tracking is. But it’s much more than that.
You’ll notice the blade pulling to one side as you cut, or hear rubbing against the guides like sandpaper on concrete. Maddening stuff. Left unchecked, the blade wears the guides down faster, can jump off the wheel mid-cut, and creates beveled cuts that look like someone sneezed while you were working.
I learned this the hard way in my first month with a used 14-inch bandsaw I picked up for $280 at a local estate sale. The blade kept creeping toward the back guide, and I assumed something was broken inside. Turns out, tracking drift is one of the most fixable problems if you know what you’re looking at — honestly, it’s almost embarrassing how simple the fix usually is.
Diagnose Your Bandsaw Blade Tracking Problem First
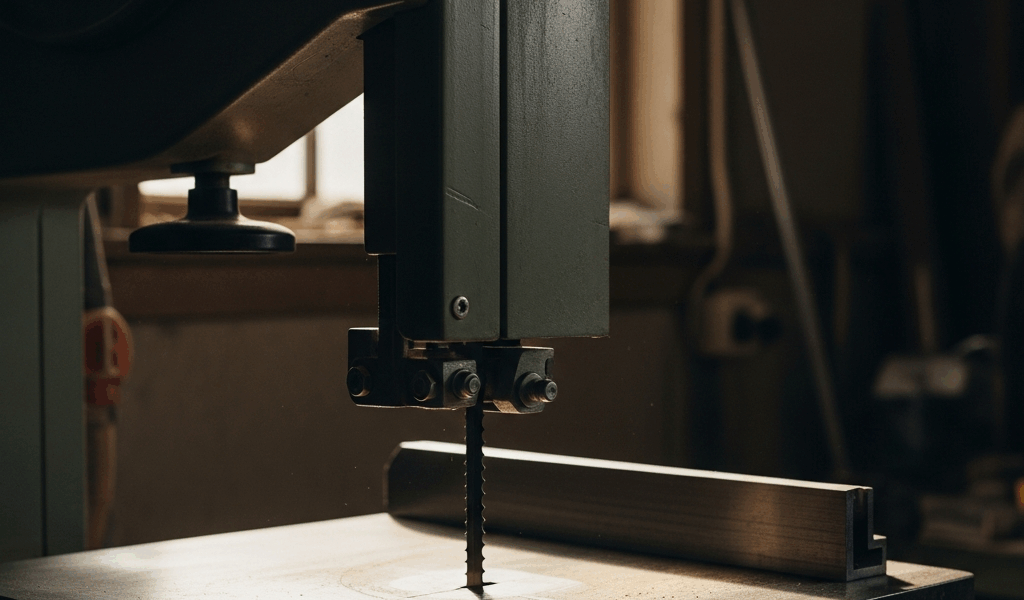
Before you touch anything, unplug the saw. Then spin the wheel by hand and watch where the blade sits on the wheel rim. Does it ride toward the front? Back? Is there wobble?
The tape test is your friend here. Tape a marker to your bandsaw frame — I use a cheap Sharpie, about 15 cents from the dollar store — so the tip nearly touches the blade as the wheel rotates. Spin the wheel slowly. If the blade moves toward the marker and touches it, you’ve got front-drift. If it moves away, back-drift. This takes 30 seconds and saves you from making adjustments you don’t need.
Look at the blade edge itself too. On a properly tracked blade, you should see equal clearance on both sides where the blade meets the wheel. If one side is kissing the rim and the other has a gap, you’re seeing drift in real time.
Also check whether the blade is actually running on the wheel’s rubber tires or sliding on bare metal — that’s a sign of something worse, like a flat spot or missing tire section. That’s rare, but it happens.
Adjust the Top Wheel Tilt to Center the Blade
Most bandsaws have a tilt adjustment on the top wheel assembly. It’s usually a knob or hex-head screw somewhere on the back or side. On my Delta saw, it’s a quarter-inch hex screw labeled “tracking adjustment” that’s maybe half an inch recessed into the frame.
Here’s the rule: the blade drifts toward whichever direction the top wheel is tilted. So if your blade drifts forward, the top wheel is tilted forward. You’ll turn the adjustment knob backward — clockwise on most designs — to tilt the wheel back and pull the blade back to center.
Turn a quarter turn. Not a half turn. Not a full rotation. Just a quarter turn. Spin the wheel and check. If you’re still drifting the same direction, turn another quarter turn the same way. If the drift reverses, you’ve over-corrected — back up an eighth turn.
This process usually takes 2–4 adjustments. I know it feels slow. It’s actually fast compared to resetting your blade position after an over-correction throws it all the way to the other side.
The point is finding the sweet spot where the blade runs dead center on the wheel rim, not grinding against either edge. It’s there. It just requires patience and small movements — nothing fancy, nothing complicated.
Probably should have opened with this section, honestly. This adjustment fixes about 70 percent of tracking complaints I see in shop forums and from friends. But it only works if your tension and guides are actually set up right, which is what comes next.
Check Blade Tension and Guide Alignment Next
Blade tension is separate from tracking, but an under-tensioned blade acts like a tracking nightmare. A loose blade flexes and wanders because there’s nothing holding it rigid on the wheel.
Most bandsaw tension gauges live on the side of the frame. A typical 1/2-inch blade should be around 12,000–15,000 PSI. A 1/4-inch blade needs less — maybe 8,000–10,000 PSI. A 3/4-inch or wider blade needs more: 15,000–18,000 PSI. These numbers matter. A loose blade under 8,000 PSI will drift no matter how perfect your wheel tilt is.
If your saw doesn’t have a gauge — mine didn’t — use the thumb test. The blade should have maybe 1/4-inch of flex if you push it hard with your thumb. Not 1/2 inch. Not 1/8 inch. About 1/4. That’s the sweet spot.
Now check your guides. The upper and lower guide blocks sit on either side of the blade and keep it straight during the cut. If they’re not perpendicular to the blade, they’ll fight your tracking adjustment and cause the blade to bind or wander.
Loosen the guides slightly — don’t remove them — and use a machinist’s square against the blade. Position the guides so they’re 90 degrees to the blade surface. Then tighten them snug. Not crushing-tight, just snug. Misaligned guides will make you think the blade is bad when it’s actually just being forced off-track by lousy guide geometry.
I once spent two hours adjusting wheel tilt on a 20-inch bandsaw at a woodworking co-op before someone mentioned the front guide was cocked at maybe 85 degrees. Fixed that, and tracking was perfect. The blade was fine. The setup was sabotaging it.
When the Blade Still Drifts — Replace It Instead
Sometimes the blade is just dead. Visible kinks in the back edge mean the blade has stress fractures. Cracks in the teeth, especially near the weld seam, mean failure is coming. A blade that’s been in service for 2+ years cutting hardwoods has probably lost some temper in the teeth and won’t hold an edge or track predictably anymore.
Blades aren’t eternal. A good 1/2-inch 4-TPI hook-tooth blade costs $35–$50. A 3/4-inch skip-tooth might run $45–$65. That’s not nothing, but it’s cheaper than fighting a bad blade for six hours.
If tracking is still drifting after you’ve centered the wheel, checked tension, and squared the guides, the blade is the culprit. Pull it off. Feel the back edge — is it warped or kinked? Look at the teeth under a light — are they evenly spaced and sharp, or do some look broken or misaligned? If you see damage, replace it.
For future reference, choose a blade based on the job. Rip work benefits from a 4-TPI hook tooth — aggressive, fast, good for thick stock. Curve work and tight detail cuts need a 10-TPI or finer skip-tooth blade. Metal or plastic cutting requires a different tooth geometry altogether. A blade that’s been dragged through six months of mixed tasks might be tracking poorly because it’s the wrong tool for what you’re cutting now.
Blade tracking isn’t magic. It’s geometry and tension working together. Diagnose first using the tape test, adjust the top wheel in quarter-turn increments, confirm your blade tension and guide alignment aren’t sabotaging you, and replace the blade if it’s actually damaged. That sequence solves the problem 95 percent of the time without any expensive repairs or replacement parts.
“`


Stay in the loop
Get the latest the workshop journal updates delivered to your inbox.