As someone who has reorganized my shop three times over the years — each time learning something new about what actually works versus what looks good on a diagram — I spent months getting comfortable with efficient shop layout through hands-on experience. Today, I will share it all with you.
Starting with the Basics
Before moving a single tool, figure out what kind of work you’ll primarily be doing. A shop focused on furniture making has different layout priorities than one set up for cabinetry, turning, or small-scale carving. Knowing your work is the only honest starting point — every layout decision flows from what the shop actually needs to do.
Zones of a Woodshop
Work Triangle
The core concept is the work triangle: table saw, workbench, and assembly area. These three zones handle the primary sequence of woodworking — cutting, shaping/joining, and assembling — and keeping them within a short distance of each other eliminates most of the unnecessary walking that makes a poorly laid out shop exhausting.
Storage Areas
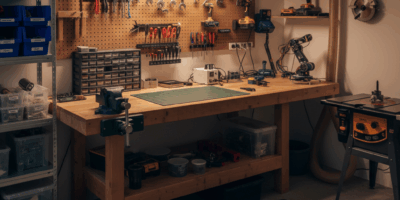
Vertical storage is your best friend in a shop of any size. Wall-mounted shelving, pegboards for hand tools, and overhead storage for seldom-used items free up floor space for the work itself. I keep frequently used hand tools on a pegboard directly at the workbench and less-used tools in closed cabinets near the back of the shop. Out of sight but organized — not buried in drawers.
Material Storage
Lumber and sheet goods go near the entrance. This seems obvious until you’ve carried an 8-foot board across a fully laid-out shop and bumped into every tool along the way. A wall-mounted lumber rack near the door keeps stock organized and accessible without creating an obstacle course. Smaller offcuts go in a rolling cart or dedicated bin — close enough to grab without searching, contained enough to stay out of the workflow.
Tool Storage
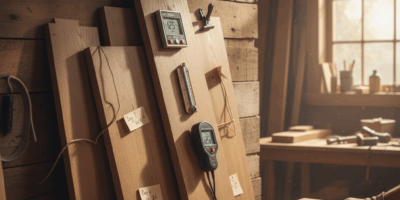
Hand tools live at the workbench — on pegboards, in wall-mounted tool holders, or in the shallow drawers of a tool chest within arm’s reach. Grouping similar tools together means less mental searching. I keep chisels together, measuring tools together, and marking tools together. Power hand tools go in cabinets or on shelves near where they’re used most.
Workbenches and Surfaces
Main Workbench
The main workbench is the heart of the shop. It needs to be waist-high, dead flat, and heavy enough not to move when you’re working. Vises and bench dogs let you hold work securely without improvising clamp setups. Position it to allow access from multiple sides — getting behind a piece to work it is often necessary, and a bench shoved against a wall limits you to front access only.
Assembly Table
The assembly table needs to be flat and large enough for the biggest projects you typically build — but not so large it dominates the room. Casters make it mobile, which is useful for pushing it out of the way when you need floor space during larger glue-ups. Probably should have mentioned this earlier: a torsion box assembly table built at workbench height doubles as an outfeed surface, saving you from needing a dedicated outfeed table.
Outfeed Table
An outfeed table at the same height as your table saw is essential for handling long rip cuts safely. This is one of those things that’s easy to skip until you’ve tried to control the back end of an 8-foot rip cut without one — and then it becomes a priority. A cabinet or open shelf underneath adds useful storage.
Power Tool Stations
Table Saw
The table saw is typically the center of the shop layout — everything else orients around it. Position it with generous infeed and outfeed space, and align it parallel to the long dimension of the shop so ripping full-length boards doesn’t require cutting off a corner. Adequate left-side clearance for the off-cut is easy to forget until you’re trying to control a falling piece with no room.
Miter Saw
The miter saw lives along a wall with infeed and outfeed support for long crosscuts. A dedicated miter saw station with built-in support arms at the same height as the saw bed is one of the best shop upgrades you can make for accuracy and safety. A stop block system on the fence turns it into a precision repeat-cut station.
Bandsaw
The bandsaw needs access from three sides — front for feeding, left for long pieces, right for resawing wide stock. I’m apparently someone who consistently underestimates how much room a bandsaw needs until I’m trying to resaw a 12-inch board and the wall is six inches away. Give it more clearance than you think it needs.
Drill Press
The drill press doesn’t need as much floor space as other stationary tools but benefits from proximity to the workbench — you often drill right before or after bench work. Wall placement works well for a floor-standing model.
Lathe and Router Table
The lathe needs full 360-degree access. Position it along a long wall with enough clearance at both ends for the longest stock you turn. The router table is best placed near the workbench for close integration with layout and fitting work.
Dust Collection
Effective dust collection is non-negotiable for health and for keeping your tools running well. A central system with dedicated drops at each major tool is the professional solution. A quality portable collector works for smaller shops if you’re disciplined about connecting it. Ambient air filtration catches the fine airborne dust that the primary collection misses — that’s the dust that causes long-term lung damage, and it’s worth addressing separately from the chips and shavings your main collector handles.
Lighting and Electrical
Shop lighting should be bright and shadow-free. LED shop lights are the current standard — energy-efficient, long-lasting, and they render colors accurately enough to evaluate wood finish without distortion. Outlets at tool-level height around the perimeter save you from running extension cords across the floor. If you have 240V tools, plan the circuits when you’re setting up the space rather than retrofitting later.
Safety Considerations
Keep walkways clear — tripping while carrying a board or a tool is how shop injuries happen. Store all flammable finishes in a metal cabinet away from heat sources. Don’t overload circuits; woodworking tools draw significant current, and a tripped breaker mid-cut is annoying at best and dangerous at worst. Ventilate when using solvent-based finishes — a shop full of finish fumes is a serious fire and health hazard.
Adapting for Space Constraints
Small shops require creative solutions. Multifunctional tools save floor space — a combination machine or a router table built into the table saw extension wing, for example. Mobile bases on heavy tools let you reconfigure the space as needed. Foldable workbenches, rolling carts for mobility, and wall-mounted storage that doubles as tool organization all help. In my experience, a well-organized 300-square-foot shop is more productive than a cluttered 600-square-foot shop — organization matters more than square footage.
Jason Michael is the editor of The Workshop Journal. Articles on the site are researched, fact-checked, and reviewed by the editorial team before publication. Read our editorial standards or send a correction at the editorial policy page.


Stay in the loop
Get the latest the workshop journal updates delivered to your inbox.