Why Your Chisel Keeps Going Dull So Fast
Chisel sharpening has started getting harder to follow with all the conflicting advice flying around. Sharpen at this angle. Use that stone. Buy this compound. And yet somehow, you’re still back at the bench every third use wondering why the edge crumbled again.
As someone who spent about eight months buying, testing, and honestly ruining chisels, I figured out how to handle why edges fail. Today, I will share it all with you.
But what is a dull chisel, really? In essence, it’s a tool whose edge geometry has failed under load. But it’s much more than that — it’s usually a symptom of something upstream. Wrong angle. Dead stone. Soft steel. And until you find that upstream problem, you’ll keep sharpening forever.
Diagnosis comes first. Always.
Check the Bevel Angle Before You Do Anything Else
Worth putting near the top.
I learned this the hard way with a set of bench chisels I found at an estate sale — paid ten dollars for the lot, beautiful old things with wooden handles. Sharpened them on my 4000-grit Shapton until my fingers were numb. Used them once. Gone dull. I repeated that cycle five times before it occurred to me to actually measure the bevel angle.
It was 22 degrees. That was the whole problem.
When you’re striking a chisel hard with a mallet, working across grain, 22 degrees is too shallow. The edge just folds under load — physics doesn’t care about your technique. Paring chisels, the ones you push by hand with light pressure, can live happily at 20 to 25 degrees. Bench chisels used with a mallet need 28 to 30 degrees minimum. Mortise chisels often want 32 to 35 degrees.
Spare yourself the wrong turn I took. Measure the angle before sharpening again.
A digital bevel gauge costs about fifteen dollars at any woodworking supply store — I use an Empire Level model I grabbed for $12.99. Lay the chisel flat on your bench, slide the gauge against the back of the blade and the primary bevel surface, and read the number. No math, no guessing.
If the angle is wrong for your task, resharpening every third use isn’t bad luck. It’s the system telling you something. Flatten the back completely and establish a new bevel at the correct angle. Takes time — probably an hour with a coarse stone. But an edge at 30 degrees holds longer than an edge at 22 degrees, full stop.
How to Tell If Your Sharpening Stone Is the Problem
A stone can look perfectly fine and be completely useless. That’s what makes stone maintenance so frustrating to us woodworkers — the failure is invisible until you understand what to feel for.
So, without further ado, let’s dive in.
Glazed waterstones are the most common offender. Run your fingertip — not your edge, your actual fingertip — across the surface. A working stone feels gritty, slightly rough. A glazed stone feels slick, almost polished. The surface has sealed over. New abrasive particles aren’t exposing. You’re sliding metal across essentially a tile floor and calling it sharpening.
A nagura stone fixes this fast. It’s a softer stone you rub across the waterstone surface to reopen the grit — two minutes of work, maybe less. I’m apparently someone who glazes stones constantly and the Atoma nagura works for me while cheaper alternatives never seem to cut it. A dedicated dresser works too, though the approach is rougher on delicate stones.
Oilstones get loaded with steel particles over time. They darken, look almost greasy. Run your thumb across the surface — if it glides without any catch, the grit is buried under debris. Mineral spirits and a soft brass brush clean it out. Scrub firmly until the grit bites at your thumb again.
Diamond plates wear unevenly. After a year or two of regular use — and this happened to my DMT 8-inch model right around the 18-month mark — you’ll notice shiny patches scattered across the surface. Those patches cut nothing. If more than 20 percent of the plate has gone shiny, replace it. They’re forty to sixty dollars, and a worn plate will quietly ruin every edge you try to sharpen on it.
Flattening your stone monthly matters too — at least if you sharpen weekly. A cupped stone makes curved bevels. Use a dedicated diamond plate for maintenance, not the same one you sharpen with.
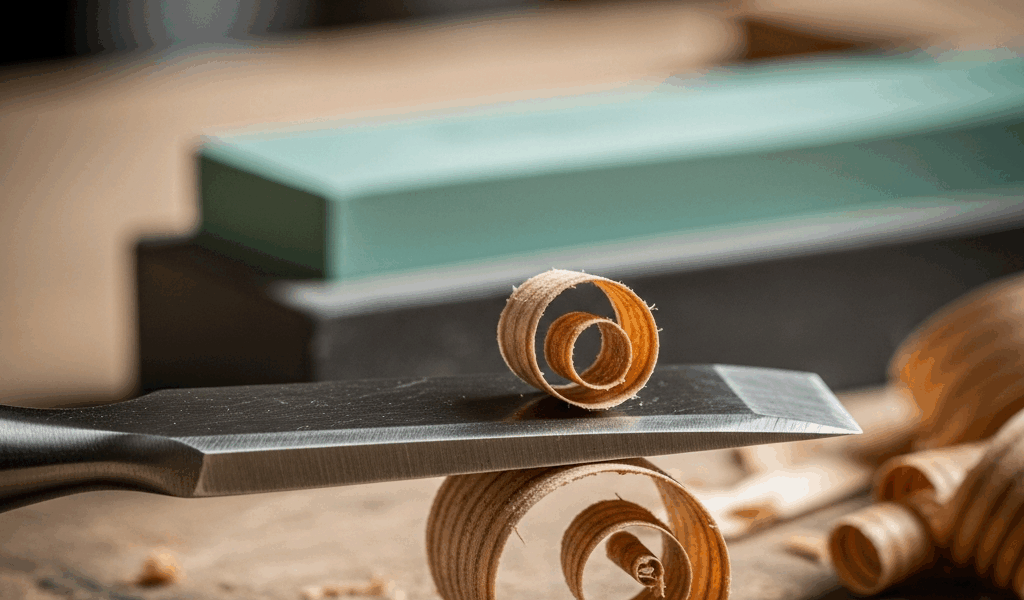
The Honing Sequence That Actually Holds an Edge
While you won’t need a full machine shop setup, you will need a handful of specific tools — a digital gauge, three grits of stone, and a leather strop loaded with compound. That’s it.
First, you should flatten the back of the chisel — at least if you want the edge to actually contact wood cleanly. Not the bevel. The back, the flat side. One firm pass on your finest stone, 6000 grit or higher. The back must be flat within about a half-inch from the cutting edge. A rounded back means nothing you do on the bevel side will matter.
Now set the bevel angle using your gauge. Mark your target angle with a pencil line along the bevel face. As you hone, that line should wear down evenly across the full width. If one side disappears faster, you’re tilting. Adjust and go again.
Work through every grit you own — don’t skip. If you have 1000, 4000, and 8000, use all three in order. The 1000-grit stone cuts fast and removes old damage. The 4000-grit refines those scratches. The 8000-grit polishes the edge to a finish that actually holds under work. Jumping straight to the 8000 means honing on top of old scratches — the edge looks sharp under light but crumbles on the first real cut.
Stroke count? Hone until the pencil line disappears from the full bevel. Usually 10 to 20 strokes per grit on a worn edge. Fewer on a fresh stone. That pencil line is your honest feedback — more reliable than any visual inspection.
The leather strop might be the best option for final finishing, as chisel sharpening requires that last refinement step. That is because stropping realigns the wire-thin edge and removes burrs the stones leave behind — it doesn’t sharpen so much as complete what the stones started. Two minutes of light strokes, always away from the edge, never into it. Edges that get stropped hold noticeably longer than edges that don’t. This is a fact I ignored for about six months. Skip the misstep I made.
When the Steel Itself Is the Problem
Sometimes the diagnosis has nothing to do with your technique. Frustrated by constant resharpening on a cheap set, I eventually tested my twenty-dollar chisels against a set of Two Cherries O1 tools using the simplest method possible — a finishing nail from the hardware drawer.
Lay the chisel flat. Try to scratch the nail with the back of the blade. Hard steel leaves a visible mark. Soft steel barely grazes it. That difference in a scratch tells you everything about what’s happening at the cutting edge.
The fingernail test works too. Drag the edge across your thumbnail at a shallow angle — hard steel bites in and catches, soft steel glides right over. Honest, immediate feedback with zero equipment.
Budget chisels with genuinely soft steel will never compete with O1 or A2 tools. This new understanding took off for me several years later and eventually evolved into the buying philosophy woodworkers know and rely on today — check the steel spec before buying anything. O1 and A2 are the standards worth chasing. Anything marketed as “stainless steel” for heavy work is usually a softer alloy engineered not to rust, which means it won’t hold an edge under real use.
Upgrading chisels is annoying. Constant resharpening every third session for the rest of your woodworking life is more annoying. That’s what makes knowing your steel type so valuable to us — it turns a frustrating mystery into a simple purchasing decision.
Sometimes the problem isn’t you at all. Worth knowing before you spend another hour at the stone.


Stay in the loop
Get the latest the workshop journal updates delivered to your inbox.