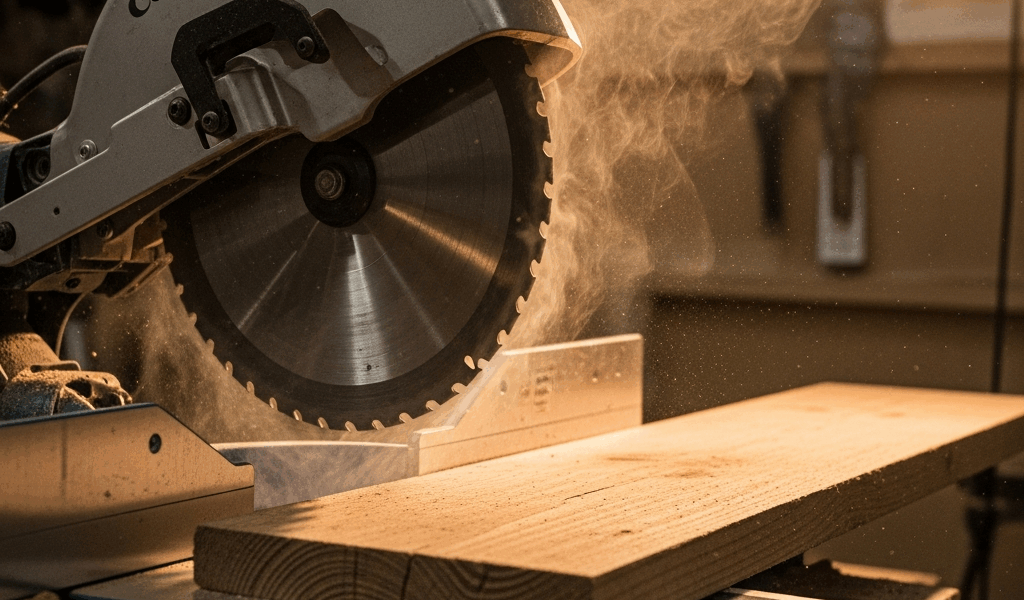
Why Your Miter Saw Blade Binds in the Cut
Miter saw blade binding in wood is one of those problems that feels worse every time it happens — the blade catches, the wood kicks, your hands jerk. And suddenly you’re standing there wondering if you just ruined a $300 tool or, worse, hurt yourself.
I learned this the hard way on a Saturday afternoon, wrestling with a compound miter saw that kept grabbing 2×6 pine like it had a personal vendetta against my Saturday plans. Spent two hours troubleshooting before realizing it wasn’t the saw at all. It was three different problems stacked together.
Binding isn’t just annoying. It’s a safety issue that kills cut quality and makes you distrust equipment that might actually be perfectly fine.
First, let’s separate binding from normal cutting resistance. A clean cut feels like steady pressure — the saw pulls the blade through with a consistent hum. Binding feels like sudden, aggressive grabbing. The blade locks up or drags sideways. The motor strains audibly. You have to stop and restart. That’s the telltale sign something’s wrong.
Three culprits cause this: a dull or mismatched blade, poor cutting technique, and misaligned fences or tables. Sometimes it’s all three working together. The trick is isolating which one before you waste time and money chasing the wrong fix.
Check Your Blade First (Teeth, TPI, Material)
A dull blade binds worse than anything else. Probably should have opened with this section, honestly.
When teeth lose their sharpness, they can’t slice cleanly through wood fibers. Instead, they compress and heat the material, creating friction. The wood pinches the blade. The motor has to work harder. That’s binding.
Here’s how to spot a dull blade without even pulling it off:
- Make a test cut on scrap wood — softwood like pine works best for testing. A sharp blade exits with a clean, dust-like kerf. A dull blade produces larger chips and burns the wood. The smell changes too: sharp blades smell like fresh sawdust; dull blades smell acrid.
- Look at the blade edge under a shop light. Hold it at a low angle across the teeth. Sharp teeth catch no light — they’re dark. Dull teeth reflect light like tiny mirrors along the blade edge.
- Listen. A sharp blade has a higher, cleaner pitch. A dull blade sounds labored and grinds.
If it’s dull, replace it. Most 10-inch miter saw blades run $20–$60 depending on quality. A DuPont-branded 80-tooth blade costs around $35. Worth every cent versus fighting a dead blade for three more months.
Now — and this catches people — the wrong TPI (teeth per inch) for your material binds as badly as a dull blade.
Miter saws are crosscutting tools. You want a high-TPI blade: 80 teeth or higher for clean crosscuts. Using a ripping blade (24–40 teeth) on a miter saw? It’ll bind on crosscuts because the wide gullets between teeth can’t clear sawdust fast enough. The chip ejection fails. Dust packs into the kerf. Binding follows.
Material type matters too:
- Wet wood is thicker, denser. A 60-tooth blade might be fine for dry pine but bind on wet southern yellow pine. Moisture adds binding risk every single time.
- Hardwoods like oak and maple need sharp, high-TPI blades. I once tried to crosscut walnut with a hand-me-down 60-tooth blade and learned fast: binding every 2 inches. Never again.
- Composite materials (engineered lumber, MDF, plywood with melamine) dull blades three times faster than solid wood. A blade that works fine on 2×4 pine will bind badly on your third sheet of cabinet-grade plywood.
Here’s your blade decision: If your miter saw originally came with a generic 80-tooth blade, start there and upgrade only if you’re cutting specialty materials regularly. If you inherited a saw with a mystery blade or a low-tooth blade, replace it immediately with an 80-tooth carbide crosscut blade — Freud, DeWalt, and Makita all make reliable $30–$50 options.
Fix Your Cutting Technique to Stop Binding
Forced by frustration, many woodworkers push blades through cuts instead of letting them work. Stop doing that.
The single biggest technique mistake: applying too much downward pressure. A miter saw blade does the cutting itself. Your job is positioning and guiding. When you press hard, you’re fighting physics and losing.
Here’s the right sequence:
- Clamp or secure the workpiece firmly against the fence. A moving workpiece binds instantly as it twists in the cut.
- Lower the blade slowly and let it contact the wood. Don’t drop it or accelerate into the wood. Let gravity and the blade’s rotation do the work.
- Maintain light, steady hand pressure — enough to keep the piece from moving, not enough to force. Honestly, this is the hardest part to teach yourself because your instinct says to push harder.
- Let the blade reach full speed before cutting. Most miter saws have a trigger with a slight delay. Wait a half-second after squeezing before lowering the blade.
Test this: Make a crosscut in pine. If the blade sings at 3000+ RPM and the wood separates cleanly with almost no effort from you, you’re doing it right. If you’re fighting resistance or the motor sounds strained, you’re pressing too hard.
The second technique problem is twisting the workpiece mid-cut. If you shift your grip or rotate the board while the blade is engaged, it catches sideways. This is a quick way to jam and bind. Once the cut starts, let it finish without moving anything.
Angle of approach matters too. Miter saws cut straightest when you lower the blade perpendicular to the fence — not at an angle into the cut. Approach from the side or twist as you lower? The blade experiences uneven pressure. Binding follows.
Align Your Fence and Table for a Binding-Free Cut
A misaligned fence is the sneaky culprit. The blade might be sharp, your technique solid, but the fence isn’t perpendicular to the blade.
When the fence is angled even slightly, the blade enters the wood at an angle. This creates uneven tooth pressure. Some teeth cut aggressively while others rub. The blade binds.
Simple check using card stock:
- Lower the blade all the way down into the table (with power off). Slide a piece of standard printer paper or card stock between the blade and fence. It should fit snugly but not force. If the gap is loose or nonexistent at one point, the fence is tilted.
- Use a small machinist’s square (like a Starrett 4-inch, costs $15–$20) held against the blade and the fence. There should be no light gap between the square and either surface.
- Check the table flatness too. Sight across it from the side. A warped or dented table throws off everything. If the table is cupped or twisted, no amount of fence adjustment fixes it.
To fix fence squareness, most miter saws have screws at the back of the fence. Loosen them slightly (not all the way) and tap the fence with a rubber mallet until it’s square to the blade. Tighten gradually and recheck.
If the table is warped, it’s usually the tool that needs replacing or professional repair, not a DIY fix. A twisted cast iron table doesn’t come back flat easily.
When to Replace vs. Adjust
Decision time: Fix it or replace it?
Blade: If it’s under $30, replace it. If it’s a quality blade that’s just dirty, clean it — run it under warm water with a soft brush, or soak it in white vinegar for 20 minutes to dissolve resin buildup. If cleaning doesn’t restore sharp cutting, replace it.
Fence alignment: This costs nothing in parts but maybe 30 minutes in labor. Do it yourself unless the fence is bent, in which case the saw needs professional repair.
Table flatness: Check this before you waste a week troubleshooting other problems. If it’s flat and parallel, you’re golden. If it’s warped, replacing the table (if possible for your model) runs $80–$200. Buying a new entry-level miter saw (10-inch, $120–$200) might make more sense than repair on an older saw.
Most binding problems in home shops come from one or more of these factors combined: a 5-year-old blade with dried resin, a fence that’s never been squared, and feeding pressure that’s too aggressive. Total fix cost? Under $50 and an afternoon. Benefit: a tool that actually works.
Start with the blade check. It’s free and fast. Then test your technique on clean softwood. Then square the fence. Work through the list in order and you’ll isolate the problem instead of guessing.

Stay in the loop
Get the latest the workshop journal updates delivered to your inbox.