How Long Does Wood Glue Take to Dry — And When Is It Really Cured
Wood glue has shifted noticeably with all the conflicting advice flying around. Ask three woodworkers and you’ll get four answers. As someone who’s been running a small custom furniture workshop for about eleven years, I worked through the fundamentals of glue timing the hard way — specifically, by ruining a nearly-finished walnut side table early on. Pulled the clamps at 45 minutes, moved the piece, stressed the joint. The glue looked solid. It wasn’t. That mistake cost me a $400 slab and a full week of work. Never again.
Drying vs Curing — The Distinction That Matters
Quick callout up front. But what is the difference between dry and cured? In essence, drying is when enough moisture has left the glue that the joint holds without clamps. But it’s much more than that — and the “more” is where people wreck their projects.
Two separate events happen after you apply wood glue, and they run on completely different timelines.
Drying is when the joint can hold itself together without external pressure — your clamp removal window. For most PVA-based wood glues under normal shop conditions — around 70°F and 50% relative humidity — that’s somewhere between 20 and 60 minutes depending on the product.
Curing is when the glue has fully cross-linked at a molecular level and hit its rated bond strength. That takes 24 hours. Sometimes longer in a cold or humid shop. The joint might feel rock solid at the two-hour mark, but the polymer chains are still organizing themselves. Stress it early and you’re gambling with hours of work.
Don’t stress a joint before the 24-hour mark — I don’t care how solid it feels. Sand it, yes. Move it carefully, fine. But don’t put it in a vise, don’t load-test it, and definitely don’t install it anywhere it’ll bear weight. Clamp time is just permission to free up your clamps for the next glue-up. Nothing else.
This distinction alone is worth more than most full articles on the subject.
Glue Type Comparison — Clamping and Cure Times
Different formulations behave differently. Here’s what I actually use in the shop and what the manufacturer specs say, along with my real-world experience.
| Glue | Clamp Time | Full Cure Time | Water Resistance |
|---|---|---|---|
| Titebond Original | 30 min | 24 hours | Interior only |
| Titebond II Premium | 30 min | 24 hours | Water-resistant |
| Titebond III Ultimate | 40–50 min | 24 hours | Waterproof |
| Gorilla Wood Glue | 20–30 min | 24 hours | Water-resistant |
| Elmer’s Carpenter’s Wood Glue | 30 min | 24 hours | Interior only |
Titebond III is my go-to for anything that might see moisture — outdoor furniture, cutting boards, anything headed into a kitchen. Runs about $14 for a 16 oz bottle at my local Woodcraft. The longer clamp time gets mildly annoying when I’m running multiple glue-ups in a day, but the waterproof bond is worth the extra fifteen minutes. Honestly, not even close.
Gorilla Wood Glue has the shortest clamp time of the bunch — genuinely useful on a busy production day. The bond is solid. I keep both on the shelf and grab whichever makes sense for the project.
Temperature and Humidity Effects
This is where most hobby woodworkers get burned, especially in winter. My shop is a detached garage — no climate control, no insulation worth mentioning. In January, that space drops to 38°F overnight and maybe climbs to 52°F by afternoon. At those temperatures, PVA glue does not behave normally. At all.
Below 50°F, clamp times and cure times both stretch dramatically. We’re talking double or more. Gorilla’s stated 20-minute clamp time can push past 45 minutes in a cold shop. Full cure below 40°F? It might not happen — the glue stays rubbery and weak even after a full 24 hours on the clamps. Titebond actually prints 55°F as the minimum application temperature on their label, and they mean it.
High humidity drags things out too. The glue cures by losing moisture — into the air and into the wood itself. When the air is already saturated, above 80% RH, that process stalls. A muggy August afternoon in a non-air-conditioned shop can add an hour to your effective clamp time even when the temperature looks fine.
How to Speed Things Up in a Cold Workshop
Frustrated by a February glue-up that just wouldn’t set, I started using a 250-watt infrared heat lamp mounted on a cheap adjustable stand from Harbor Freight — about $28 total. Aimed at the glue joint from roughly 18 inches away, it raises the surface temperature enough to get cure times back to something reasonable. That’s what makes a small targeted heat source so endearing to us unheated-garage woodworkers.
I also started keeping my glue bottles stored inside the house rather than out in the shop during cold months. Cold glue is thicker, harder to spread evenly, and slower to set — three problems that compound each other. Avoid the path I took and assume the bottle on your cold shelf is behaving the same as one at room temperature.
Running a small space heater for a few hours before your glue-up — to warm the actual wood, not just the air — makes a real difference too. Cold wood wicks differently, and the temperature gap between the glue and substrate slows the whole bond formation process down.
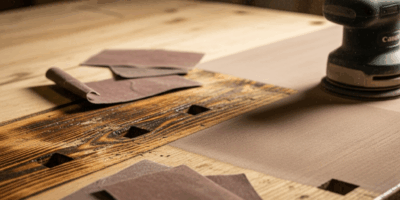
How to Tell If Glue Is Dry Enough
You don’t always need a clock. There are physical signs worth knowing.
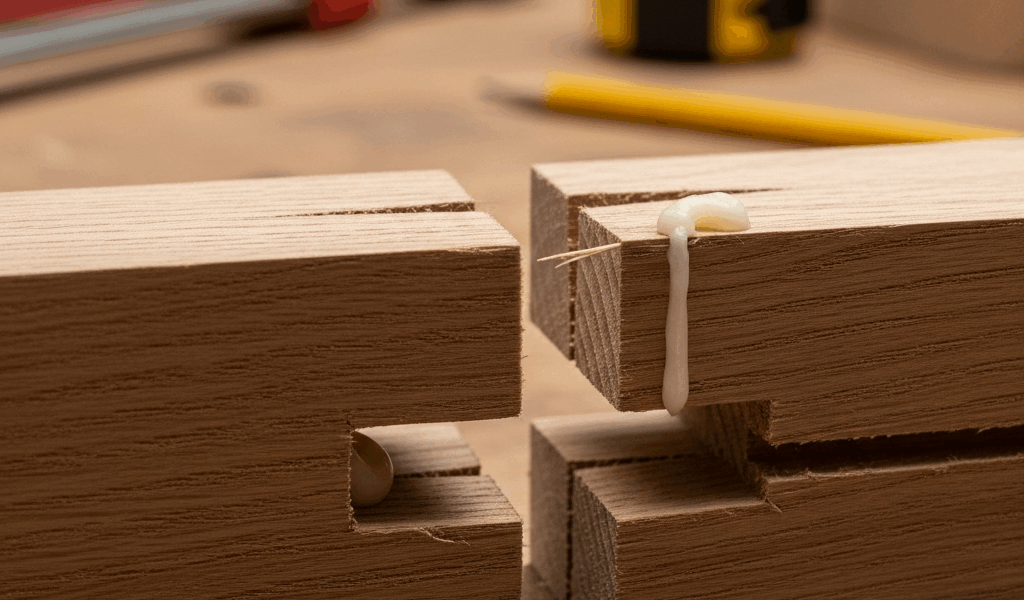
- Color change — PVA glues like Titebond start milky white and go translucent as they dry. Still opaque white? Not there yet. Once it shifts to a yellowish, glassy color, you’re getting close.
- The fingernail test on squeeze-out — Press your fingernail firmly into any bead of glue that squeezed out of the joint. Dents easily or feels rubbery? Leave the clamps on. Hard enough that your nail leaves no impression? Clamp time is probably done. This is my most-used field check, honestly.
- The tap test — Lightly tap the glue line with a knuckle. Wet or partially set glue sounds slightly dull. Fully set glue sounds more like tapping the wood itself. Takes practice — I wouldn’t rely on it alone, but it’s a useful secondary check once you’ve heard the difference enough times.
When in doubt, wait longer. An extra hour on the clamps costs you almost nothing. A failed joint on a finished piece costs you everything. There is no prize for fast.
Clamping Pressure — More Is Not Better
This one catches people off guard. More clamping pressure does not mean a stronger joint. It often means a weaker one. Apparently a lot of woodworkers never hear this until after they’ve already learned it the expensive way.
Squeezing a joint too hard forces most of the glue out from between the mating surfaces — this is called starving the joint. It leaves too little adhesive in the bond line to achieve full strength. You want a thin, even glue film between the surfaces, not bone-dry wood crushed together with a ring of squeeze-out on both sides and nothing left in the middle.
For most straight wood joints — edge gluing, face gluing, mortise and tenon — target pressure sits somewhere between 100 and 300 PSI depending on wood species and joint type. Softwoods need less. Hardwoods need more. Dense exotics like purpleheart or ipe can handle up to 300 PSI without issue.
Calculating Pressure from Your Clamps
Most people never think about this. A standard 3/4-inch pipe clamp at full tightening with average hand torque generates roughly 500 to 1000 lbs of force. If your joint area is 4 square inches, you’re looking at 125 to 250 PSI — right in the sweet spot. Spread that same clamp over a 10-square-inch joint and your pressure drops to 50–100 PSI, which probably isn’t enough for a hard maple glue-up.
The practical takeaway: use more clamps spaced closer together rather than fewer clamps cranked harder. I aim for one clamp every 6 to 8 inches along an edge glue-up. My Bessey K-body revo clamps — the 24-inch model, around $55 each — have excellent even-pressure distribution, and I rarely have to think about over-clamping when they’re properly spaced.
Burned by over-clamping a cherry panel years ago, I now keep a simple rule taped above my bench: squeeze until squeeze-out appears along the whole joint, then stop. That visual confirmation of full contact means you have enough pressure. Anything beyond that is working against you.
Wood glue is not magic — but it’s reliable when you work with it instead of against it. Understand dry time versus cure time, manage your shop conditions, read your glue visually, dial in your clamping pressure. Do those four things and the joint will hold for decades. Skip any one of them and you’re taking chances you don’t need to take.


Stay in the loop
Get the latest the workshop journal updates delivered to your inbox.