French Cleat Wall for Your Workshop — Complete Build Guide
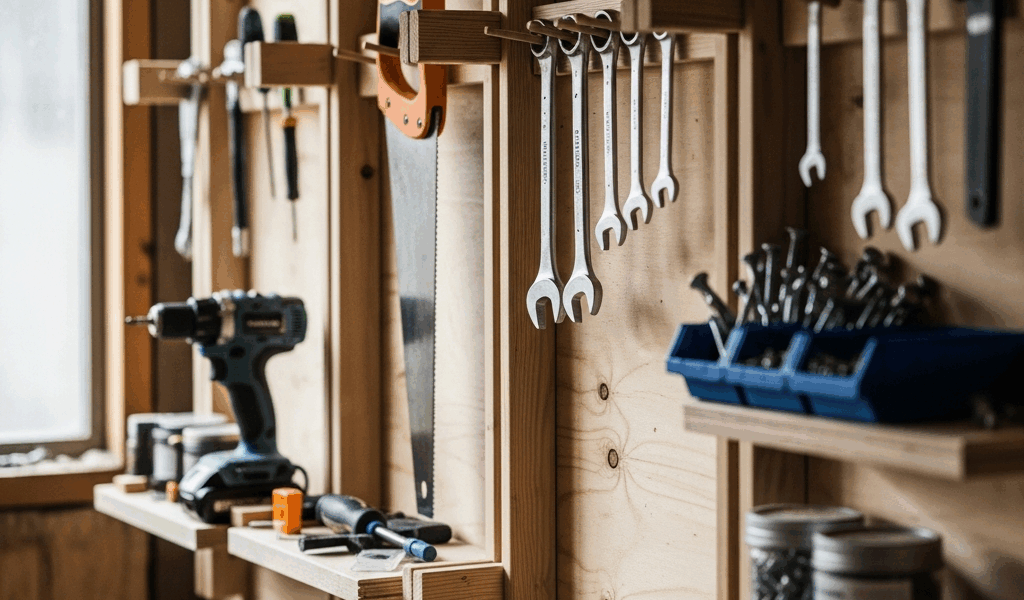
French cleat walls have evolved with all the conflicting advice flying around — some people swear by 2-inch strips, others insist on 4-inch, and half the YouTube tutorials skip the part where they tell you how badly their first attempt went. As someone who built a 12-foot french cleat wall in a garage shop about three years ago, I worked through the fundamentals of what works, what fails, and what I’d do differently. Every session after I finished that wall went faster, calmer, and with considerably less swearing at missing tools. I’ve added to it probably a dozen times since. This guide covers the whole system: the wall itself, the holders, the heavy tool mounts, and the layout logic I wish I’d used from day one.
Why French Cleats Beat Pegboard in a Serious Workshop
Pegboard is fine. I’ll say that upfront. Cheap, installs in an afternoon, works well enough for a casual hobbyist. But if you’re running a serious workshop — router table, full chisel set, cabinet saws, clamps by the dozen — pegboard just isn’t built for that life.
Here’s what actually breaks down. The hooks pull out. You bump one tool and three hooks come loose, and now everything adjacent shifts. Standard 1/4-inch pegboard setups have embarrassingly low weight limits — most manufacturers won’t quote anything over 10 to 15 pounds per hook. My hand router alone is 8 pounds. A dedicated holder for my Milwaukee M18 Fuel circular saw needs to hold 11 pounds with room to spare. The math stops working fast.
French cleats hold weight through shear force across a full horizontal strip rather than through a hook jammed into a punched hole. A properly lagged cleat — 3/4-inch Baltic birch driven into two studs — will hold several hundred pounds before you’re having a structural conversation with your wall. Individual holders I’ve built support my 14-inch bandsaw sled, a full set of pipe clamps, and a router table insert. Not a single creak.
Slat Wall — the Middle Option
But what is slat wall, exactly? In essence, it’s a modular panel system — think pegboard’s more expensive, better-looking cousin. But it’s much more than that, which is actually the problem. Systems like StoreWALL or Rubbermaid handle decent weight and the accessories are genuinely good. The issue is cost and flexibility. A 4×8 panel of quality slat wall runs $80–$120. You’re also locked into their hook ecosystem unless you adapt around it.
That’s what makes french cleats endearing to us workshop obsessives. You build exactly what each tool needs. Nobody sells a holder for my Lie-Nielsen No. 5 1/2. So I just built one — from offcuts, in about 20 minutes.
Materials and Cuts — Getting the Wall Built
Here’s the part worth saying first. None of the holder stuff matters until the wall is up.
The Material List
- 3/4-inch Baltic birch plywood — I used four 4×8 sheets for a 12-foot wall, cost me $58/sheet at Menards, total $232
- 3-inch lag screws — 1 lb box, about $14 at Home Depot (you’ll burn through roughly 40–50 for a full wall)
- Structural washers for the lags — same box, usually included or buy a small pack separately
- Wood glue for building holders
- 2-inch screws for holder construction
- Sandpaper — 120 and 220 grit for finishing holders (optional, but makes them nicer to actually grab)
- A table saw or track saw for the rip cuts
- Stud finder — seriously, don’t skip this
Total material cost for the wall itself ran me about $280. Holders get built from offcuts, so they’re nearly free once the wall is standing.
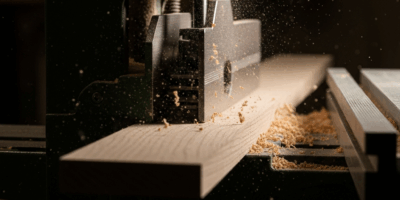
The Rip Cut — Getting the Angle Right
Everything in this system depends on a clean 45-degree bevel. Set your table saw blade to 45 degrees and rip your plywood into strips — I cut mine at 3-inch widths, though anywhere from 2.5 to 4 inches works fine. The bevel faces up and toward the wall. Get that backwards and your holders won’t lock in. Ask me how I know.
For spacing, I went 8 inches center-to-center across the whole wall. Some builders go 12 inches — faster installation, fewer attachment points. Eight inches gives any holder more placement flexibility. On my 9-foot ceiling, I got 11 rows of cleats. That’s a genuinely absurd amount of real estate.
Mounting to Studs
Non-negotiable: every cleat strip needs to hit at least two studs. I pre-drilled through the cleat before lifting it, countersunk slightly, then drove 3-inch lags through the plywood and about 2.5 inches into the stud. The wall doesn’t move.
Skip past the mistake I made — on my first strip I didn’t countersink deep enough. The lag head sat proud of the bevel face and interfered with holders seating flush. Drill the countersink first, then the through-hole. Ten extra seconds that saves a lot of frustration.
Level each strip before driving the second lag. A 48-inch level works well here. Cleats that are even slightly off make everything on them look crooked — and it’ll bother you every single time you walk into the shop. Every. Time.
Layout Planning Before You Cut
Stop. Don’t start ripping cleats until you’ve mapped the wall. I skipped this step properly the first time around, and I moved three sections of holders within the first month — which is exactly as annoying as it sounds.
Map the Wall First
Tape out zones on your bare wall using painter’s tape. Use actual tool dimensions — set your chisels on the bench, measure the width, tape it out at the height you want them. Do this with your drill, hand planes, clamp collection, saw blades. You’ll immediately see where you’ve been unrealistic about space. Almost everyone overestimates what fits in the middle section and underestimates the bottom third.
The height rules I follow: heavy tools at waist height — 36 to 48 inches off the floor. Lighter items above that. Frequently used tools at eye level or just below. Things I reach for once a month — specialty bits, dado stack, mortising attachments — go near the top where I need a step stool. Nothing you use daily goes above shoulder height. You’ll regret it within a week.
Workflow Zoning
Think about physical workflow, not just storage. My assembly bench sits on the left, table saw in the center, drill press on the right — so hand tools live on the left section of the cleat wall, power tool accessories in the center, drilling and boring tools on the right. I don’t cross the shop for anything I reach for in a normal build sequence. That’s the actual value of planning before you build.
Leave a full 18-inch zone somewhere on the wall intentionally empty. Future tools. You’ll buy more — you know you will.
Tool Holders You Should Build First
This is where a french cleat system stops being good storage and becomes a genuinely custom shop. The holders are the whole point. Here are the five I built first and would build again in the same order.
Chisel Rack
Cut a piece of 3/4-inch plywood about 18 inches wide by 10 inches tall. Drill a row of 1/2-inch holes along the lower third, angled back slightly — this cradles the handles while the blades face down and stay protected. A matching 45-degree cleat on the back lets it hang anywhere on the wall. Mine holds 14 chisels from 1/8-inch to 1.5-inch in a neat row. Build time: about 25 minutes, including sanding.
Drill and Driver Holder
Cut two angled slots into a block — I used two stacked layers of 3/4-inch ply glued together for the 1.5-inch thickness. The slots hold the tools nose-down. Triggers don’t get caught, batteries stay accessible, drills don’t tip. My Milwaukee 2804-20 and Dewalt DCD800B sit side by side in one holder about 8 inches wide total. Simple, fast, works perfectly.
Clamp Rack
Almost embarrassingly simple. Horizontal wooden pegs — 3/4-inch dowel, about 6 inches long — driven into a plywood backer and angled upward 10 degrees. Hang the clamp bar over two pegs. The angle keeps them from sliding off. I store 18 bar clamps this way across a 24-inch wide holder. It’s the most-used thing on my entire wall, by a wide margin.
Hand Plane Shelf
Frustrated by planes tipping over on standard shelves, I built a dedicated holder with individual slots sized for each plane — a No. 4, No. 5, and No. 7. Each slot has a small stop block at the back so the planes sit level with their soles facing out, not down. Blades stay protected, handles accessible. The whole unit runs about 36 inches wide and 8 inches deep.
Saw Blade Storage
Circular saw blades are awkward to store and genuinely dangerous stored wrong. I built a divided vertical slot system — essentially a vertical file holder, but for blades. Each slot is exactly 3/4-inch wide, made from 1/4-inch plywood dividers glued into a 3/4-inch plywood box. Blades slide in vertically, labeled by tooth count on the front. No more blades stacked loose in a drawer, waiting to cut someone’s hand.
How to Mount Heavy Tools Safely
Single holders with a single cleat work for most things. For heavy tools — anything pushing past 20 pounds — the approach changes.
Use Multiple Cleats and Plywood Backing
My belt sander holder flexed badly the first time I loaded it. Built wrong — single cleat, undersized backer. I rebuilt it with a full plywood backer spanning four cleat rows instead of one. The backer is 3/4-inch ply, 12 inches tall, with four cleats glued and screwed to the back of it — each engaging a different row on the wall. Load distributes across all four contact points. My Makita 9403 belt sander — about 13 pounds — has sat on that rebuilt holder for two years without moving a millimeter.
Router Table Storage
The router table itself lives on a mobile stand, not the wall. But the insert plates and router store on the wall just fine. The router — a Porter-Cable 7518, about 15 pounds — sits on a dedicated shelf bracket with a lip at the front to keep it from vibrating loose. The bracket uses a full-width cleat spanning 18 inches. It hasn’t shifted once.
Cordless Tool Charging Station
This one took a few iterations, honestly. First version was just shelves — messy, cables everywhere. Second version runs a power strip mounted to a plywood backer, with individual holders for each charger and a cable management slot cut into the bottom of the backer. All chargers live in one 24-inch zone now. Cables drop through the slot, no tangle. The whole backer mounts on three cleat rows and weighs practically nothing loaded.
One practical rule for heavy mounts: if the tool needs two hands to lift it onto the holder, the holder needs to engage at least three cleat rows. If you need a ladder to mount it, redesign for a lower position. You will drop something eventually — make it happen close to the floor.
The french cleat wall isn’t a weekend project with a clean finish line. It’s a system you build into over months and years — mine still isn’t done. I added a finishing supply section last spring and I’m planning a dedicated measuring and layout tool zone this fall. That’s the whole point, really. The wall grows with the shop, one holder at a time, exactly as fast as you actually need it to.


Stay in the loop
Get the latest the workshop journal updates delivered to your inbox.