Router Bit Burning Wood — Why It Happens and How to Stop It
Router burn has gotten complicated with all the conflicting advice flying around. As someone who spent a full year scorching perfectly good cherry boards before figuring out what was actually going wrong, I learned everything there is to know about this subject the hard way. Today, I will share it all with you.
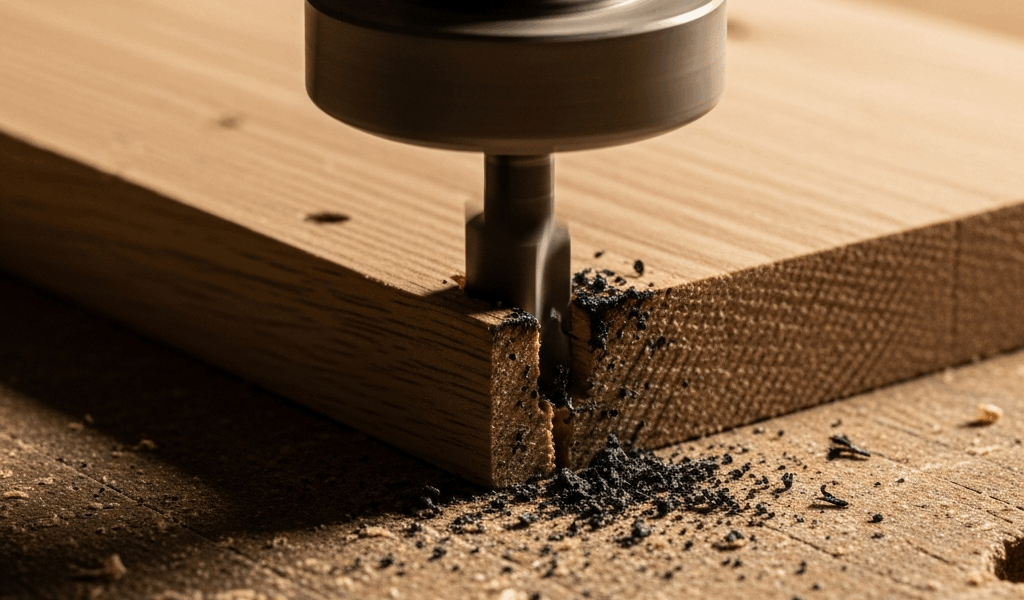
That first year in my shop, I’d pull a routed edge off the table and find a dark brown — sometimes almost black — char line running the full length. I assumed I was doing something fundamentally wrong. Turns out I was. But the fixes are dead simple once you understand what’s happening at the bit itself.
Here’s the short version: burn marks reveal a mismatch between three variables in your setup. Get them aligned, and the burns disappear. Keep them misaligned, and no amount of wishful thinking saves your next cherry board.
The 3 Most Common Causes of Router Burn
When I started asking other woodworkers about their burn problems, three culprits kept surfacing. Not all three are always guilty at once — sometimes it’s just one. But they tend to work together to create that telltale scorch line.
Feed Rate Too Slow
This one surprised me when I first heard it. Pushing slower feels safer, right? Wrong. Feeding the wood too slowly is the most common burn cause I’ve encountered — the bit sits there chewing the same fibers over and over instead of moving through fresh wood. Friction builds. Heat spikes. The wood chars.
Think of a dull saw blade dragging through a kerf versus a sharp one cutting cleanly. Same principle at work. The bit stays engaged too long in the same spot, and the wood pays for it.
Bit Speed Too High for the Diameter
Larger bits running at the same RPM as smaller bits generate dangerous peripheral speeds. A 2-inch bit at 20,000 RPM spins much faster at its cutting edge than a half-inch bit at identical speed. The edge moves so fast it generates heat rather than cutting cleanly. That’s physics, not opinion.
The Dull Bit Problem
A worn carbide edge doesn’t slice — it scrapes and crushes wood fibers instead. Crushed wood burns. I once ran a dull 3/4-inch core box bit on hard maple for an entire afternoon before bothering to check it. The scorch was so dark I thought I’d grabbed a different bit entirely. One fresh bit, one clean pass. Problem solved.
Quick diagnosis before moving on: do all three match your current setup, or is one obviously wrong? Start there. That’s what makes this troubleshooting approach so useful to us woodworkers — it gives you a concrete place to look first.
Speed and Feed Rate — The Relationship That Matters
Probably should have opened with this section, honestly. These two numbers dance together. Ignore one and the other fails you every time.
Most trim routers max out around 30,000 RPM. Fixed-base and plunge routers often cap at 25,000. Some higher-end models — like the Bosch 1617EVSPK — hit 25,000 with variable control down to 8,000. But raw RPM tells you nothing on its own. What matters is the speed at the cutting edge — the peripheral velocity — which changes dramatically with bit diameter.
A 1/4-inch bit at 24,000 RPM behaves completely differently than a 1-1/2-inch bit at that same speed. That’s why manufacturers publish speed charts organized by bit diameter.
The Basic Rule
Larger bits need slower RPM. Smaller bits tolerate higher speeds. Standard reference point: 1/4-inch bits work well at 24,000 RPM. A 2-inch bit? Drop it to somewhere around 10,000 RPM. That’s not a small adjustment.
Feed rate means how fast you move the wood past the bit. Too slow burns. Too fast tears grain or leaves rough edges. The sweet spot shifts depending on wood species, bit sharpness, and the profile you’re cutting.
Finding Your Target Feed Rate
I use a simple field test: does the bit pull the wood forward slightly, or am I having to muscle it through? If it pulls, you’re close. If you’re pushing hard, you’re probably feeding too slow. If the bit pushes back aggressively against your hands, you’re likely going too fast.
For hardwoods like cherry and maple at standard speeds, a comfortable hand-feed usually lands around 3 to 5 inches per second. Softwoods tolerate slightly faster movement. Figured grain — quilted maple, crotch pieces — demands slower feeds and some patience.
Here’s a practical chart I keep taped inside my router cabinet door:
- 1/4-inch bits: 20,000–24,000 RPM
- 1/2-inch bits: 18,000–21,000 RPM
- 3/4-inch bits: 15,000–18,000 RPM
- 1-inch bits: 12,000–16,000 RPM
- 1-1/2-inch bits: 10,000–12,000 RPM
- 2-inch bits: 8,000–10,000 RPM
These aren’t gospel. They’re starting points — adjust based on your wood species and bit condition.
Is Your Bit Dull? How to Tell
New carbide bits run anywhere from $15 to $60 depending on profile and quality. So naturally, I hold onto mine longer than I should. Learning to spot a genuinely worn bit saved me countless burned edges — and a few ruined panels I’d rather forget.
The Visual Inspection
Hold the cutting edge under a bright shop light. A sharp carbide edge catches light in a thin, barely-visible line. A dull edge shows a visible flat or rounded surface — you can actually see a surface instead of just a line. That surface is your burn problem, right there in plain sight.
The Feel Test
I’m apparently a tactile learner, and this test works for me while visual inspection never quite did. Carefully run your thumbnail perpendicular across the edge — toward you, never away. A sharp edge should catch slightly. A dull edge slides smooth. Keep it gentle. Don’t make my mistake of pressing too hard and slicing yourself on a bit that turns out to be perfectly sharp.
Sharpening vs. Replacement
HSS bits can be sharpened with a simple file or slipstone. I have a 1/2-inch roundover in HSS that’s been touched up four times. It cost $8 new at Woodcraft back in 2019, so sharpening absolutely makes sense on that one.
Carbide keeps its edge longer — often three to five times longer than HSS on identical work — but once dulled, professional sharpening runs $15 to $25. For a $20 bit, replacement makes more financial sense. For a premium 1/2-inch spiral upcut costing $55 or more, sharpening becomes the smarter call.
Most woodworkers I know replace carbide bits outright rather than sharpen them. Time lost versus cost of a new bit usually favors replacement, especially in a production context.
Wood Species That Burn Easily
Not all wood burns equally. I’ve routed white pine edges for hours without a hint of scorch, then switched to cherry and had burns within three passes at the exact same settings. That’s what makes species selection so important to us woodworkers — the same setup can behave completely differently depending on what’s on the table.
The Burn-Prone Species
Cherry is the notorious culprit. Its fine grain and density create friction fast. Hard maple follows closely behind. Walnut, when properly kiln-dried, burns readily. Ash can be problematic too. Softwoods — pine, spruce, Douglas fir — rarely burn under normal conditions. Oak and poplar sit somewhere in the middle of the spectrum.
Species-Specific Adjustments
When I’m routing cherry or hard maple, I drop my RPM about 15% below my standard setting for that bit diameter. And I deliberately slow my feed rate — not creeping-slow, but controlled and deliberate. The bit should sound almost relaxed rather than strained. There’s an audible difference once you train your ear for it.
For cherry specifically, I’ve had my best results running a 1/2-inch roundover bit at around 16,000 RPM instead of my usual 19,000. That 3,000 RPM difference matters more than you’d think. On soft maple versus hard maple, I make even bigger adjustments — hard maple gets treated almost like cherry in my shop.
Moisture content affects burn risk too. Kiln-dried wood burns more readily than slightly green material. Wood below 8% moisture content is the worst offender. If you’re battling persistent burns on hardwood, check your moisture meter before changing anything else.
Removing Burn Marks If They Already Happened
Sometimes prevention fails. The board’s already routed with that horrible char line running its full length. So, without further ado, let’s dive into what actually fixes it.
Light Surface Sanding
A 120-grit sanding sponge removes light scorch marks surprisingly well. Wet the edge first, let it dry slightly, then sand lightly across the grain. The char often sits only on the outermost wood fibers — it’s not always as deep as it looks.
For heavier burns, I move to 100-grit first, then back up through 150-grit. This takes patience. Rush it and you’ll round over your routed profile, which creates a whole new problem to solve.
Scraping as an Option
A cabinet scraper held at roughly 45 degrees can lift burn marks without the sanding dust. I use this approach when the profile is delicate enough that sanding would compromise it. A Bahco card scraper or an old chisel ground to a fresh burr both work here. Requires technique — but preserves profile detail better than sandpaper in tight situations.
Re-routing With Fresh Setup
But what is re-routing exactly? In essence, it’s simply running the piece again with corrected settings. But it’s much more than that — it’s confirmation that you’ve actually identified and fixed the root cause. If the burn is severe or covers a large area, re-routing with corrected speed and feed settings is honestly faster than trying to sand it out. Use a fresh or newly sharpened bit. Takes about 10 minutes and guarantees a clean edge.
Going forward: diagnose which of your three variables was wrong — speed, feed, or bit condition — and adjust before the next piece hits the table. Test on scrap first. That’s not wasting wood. That’s just professional practice.


Stay in the loop
Get the latest the workshop journal updates delivered to your inbox.