Miter Saw Setup and Calibration — Get Perfect Cuts Every Time
Miter saw setup and calibration is the difference between trim that fits perfectly on the first try and trim you end up shimming with painter’s tape and hoping nobody looks too closely. I’ve been running a small custom millwork shop for eleven years, and I still calibrate my Dewalt DWS779 before any project where the tolerances actually matter. Not because I distrust the saw — it’s a good saw — but because saws drift. They get bumped, moved, dropped by guys who swear they didn’t drop anything, and suddenly your 45-degree cuts are producing gaps you could slide a business card through. This guide walks through every calibration check in the order that makes mechanical sense, with specific measurement methods and tolerances that are actually achievable in a working shop.
The Five Calibration Checks — In Order
The sequence matters here. You can’t meaningfully calibrate your bevel angle if the blade isn’t square to the fence. Each check builds on the last one, so skipping around wastes time and produces unreliable results.
Here’s the order, and the reasoning behind it:
- Blade square to fence — establishes your lateral reference plane
- Blade square to table — establishes your vertical reference plane (bevel zero)
- Fence alignment — confirms the fence is straight and coplanar with itself
- Miter angle accuracy — tests the detent positions against a known square reference
- Bevel angle accuracy — tests bevel detents once the blade-to-table relationship is confirmed
The whole process takes about twenty-five minutes if you’ve done it before. The first time, budget an hour. You’ll need a reliable combination square, a quality framing square, and a good digital angle gauge — I use a Wixey WR300 that I bought for around $40, and it’s been worth every cent. A cheap gauge will lie to you with great confidence.
Blade to Fence — The Most Important Check
Probably should have opened with this section, honestly, because this single check catches the problem that ruins more cuts than anything else. If the blade isn’t perfectly perpendicular to the fence, every crosscut you make is wrong. Not wrong by a lot, necessarily — but wrong in a consistent, accumulating way that shows up badly when you’re fitting mitered frames or running long sections of baseboard.
How to Measure Properly
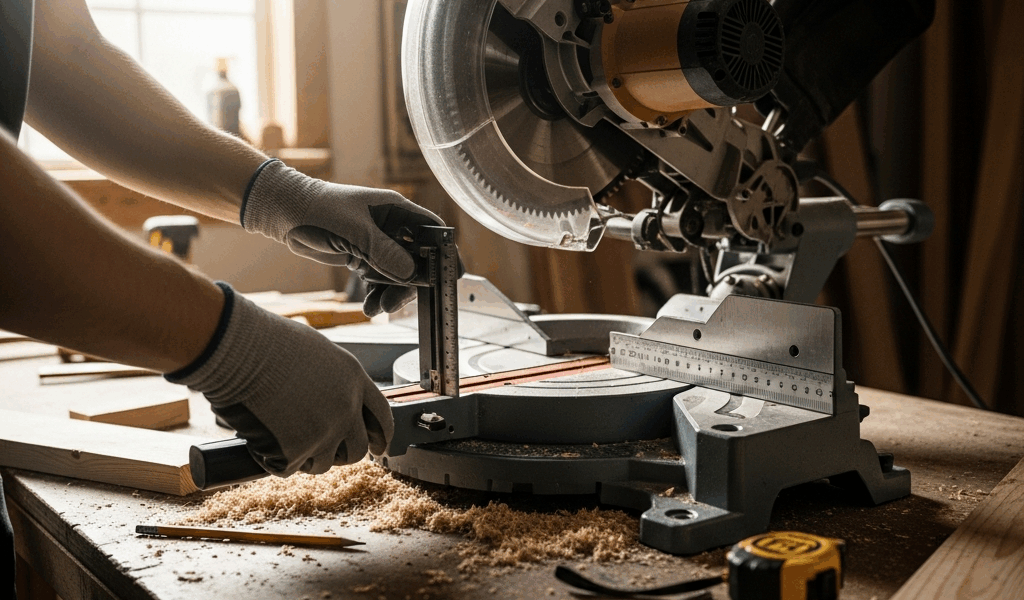
Lower the blade to about two inches above the table surface. Do not put your combination square against the teeth — put it against the flat body of the blade. Carbide teeth splay outward slightly by design, and measuring against them introduces error before you’ve even started. Place the square’s body flush against the fence and slide the rule out until it makes contact with the blade flat.
Your target is within 1/64 of an inch. That’s 0.015 inches. At that tolerance, a forty-five degree miter across a five-inch piece of baseboard will produce a gap of less than a hair’s width. That’s acceptable. Beyond that, you’re in shim-and-pray territory.
Adjusting the Fence
Most sliding fences on compound miter saws have two or three adjustment bolts behind the fence body. Loosen them slightly — not all the way out — and use a dead-blow mallet to tap the fence into position while the square is still in contact with the blade. Then snug the bolts back down and recheck. It almost always moves slightly when you tighten, so check twice before declaring victory.
One mistake I made early on: I was adjusting the fence on my old Ridgid R4120 and I fully loosened one bolt before the others. The fence pivoted out of square in a completely different direction, and I spent forty minutes chasing my tail before I figured out what had happened. Loosen all adjustment bolts the same small amount simultaneously. Small adjustments. Recheck every time.
Blade to Table — Fixing Bevel Zero
The blade should be perfectly vertical — ninety degrees to the table surface — when the bevel is set to zero. This is your bevel zero stop, and it’s controlled by a small set screw on the bevel mechanism. On most saws, this screw is accessible from the front or side of the pivot housing. Check your manual for the exact location. On the Dewalt DWS779, it’s behind a small rubber plug on the left side of the bevel pivot.
Taking the Measurement
Set the saw to zero bevel, lock it down, and place your combination square flat on the table with the rule running up the face of the blade body. You’re looking for full contact along the entire length of the rule. Any daylight at the top or bottom tells you the blade is tilted. The Wixey digital gauge also works well here — stick it to the blade body with the magnet and read the angle directly. You want 90.0 degrees.
Adjusting the Stop Screw
Find the bevel zero stop screw and turn it in small increments — usually an eighth of a turn produces a meaningful change. Tilt the saw slightly past zero, then bring it back to zero and let it settle against the stop. Check the angle again. Repeat until the saw reads true. Always approach the stop from the same direction when testing, because mechanical stops have a small amount of play and you want the blade resting consistently against the stop, not floating between approaches.
After you’ve dialed in the stop, make a test cut in scrap. Two cuts from opposite ends of a board, face down, mating the cut surfaces together. If they form a flat plane with no rocking, your bevel zero is correct. If there’s a gap at the top or bottom of the joint, you’ve still got a few hundredths of a degree to chase.
Miter Angle Calibration
Here’s where the forty-five degree test comes in, and it’s more reliable than trusting the saw’s built-in angle indicator. The indicator on most saws — even good ones — is accurate to about half a degree. That’s not good enough for picture frames or cabinet face frames where four forty-five degree cuts need to produce a perfect rectangle.
The Forty-Five Degree Test Method
Cut two pieces of scrap at forty-five degrees from opposite directions — miter left and miter right, same angle setting on each. Stand the cut ends together on a flat surface and check the resulting corner with a reliable square. The corner should be exactly ninety degrees. If it reads eighty-nine degrees, your detent is sitting about half a degree off. If it reads ninety-one degrees, same problem, other direction.
Why two cuts instead of one? Because one cut only tells you that the blade is forty-four or forty-six degrees relative to something. Two matching cuts at the same setting amplify any error into the corner angle, making it easier to detect. Divided by two gives you the error per cut.
Adjusting the Miter Detents
Most modern saws have micro-adjust capability on the common detents — zero, fifteen, twenty-two-point-five, thirty, and forty-five degrees. The adjustment is usually a small screw that changes where the detent ball seats. Common problem: the detent is close but not exact. It feels positive and definitive, and it still cuts slightly off. That positive click is a mechanical feature, not a guarantee of accuracy.
Frustrated by a persistent gap in a cabinet door frame he’d cut three times, a cabinetmaker I know spent an afternoon remeasuring and discovered his saw’s forty-five-degree detent was consistently sitting at forty-four-point-six degrees using a known-good digital protractor. He adjusted the detent screw by barely a quarter turn and the problem disappeared. The saw had been like that since he bought it. He just hadn’t tested it properly at setup.
Small adjustment, huge impact. Check the detents. Don’t assume the factory got it right.
Bevel Angle Accuracy
Once blade-to-table is confirmed, checking the bevel angle detents follows the same logic as miter angle work. The most critical bevel position is forty-five degrees for compound miter work on crown molding. Use your digital angle gauge stuck directly to the blade body — don’t trust the bevel scale printed on the saw housing. Those scales are reference points, not precision instruments.
Set the bevel to forty-five, lock it, and read the gauge. Adjust the bevel stop screw until the reading is consistent and accurate. Make a test cut. The test here is the same forty-five-degree paired cut method — two cuts from opposite bevel directions, mated together, checked against a known reference square.
Ongoing Maintenance — Keep It Accurate
Calibration isn’t a one-time event. Here’s what actually keeps a saw accurate over months of real use.
Clean the Table and Fence Regularly
Sawdust compresses. A layer of fine dust packed against the fence face introduces a consistent tilt to every piece you cut against it. I wipe down the table and fence with a dry rag before any precision work. Takes ninety seconds. Costs nothing. I’ve seen guys spend an hour recalibrating a saw that just needed to be cleaned.
Check Alignment After Moving the Saw
Every time the saw moves — off the stand, into a truck, across the shop — run the blade-to-fence check before cutting anything that matters. The DWS779 weighs around 56 pounds. That’s enough mass that even setting it down firmly on the stand can shift the fence a few thousandths. Quick check, two minutes, saves you the frustration of discovering the problem at cut thirty instead of cut one.
Blade Change Procedure That Preserves Calibration
When you change blades, check blade-to-table and blade-to-fence afterward. Not because the blade change itself moves the fence, but because it’s an opportunity to confirm that the new blade is tracking true and that nothing shifted during the change. Some blades run slightly out of flat from the factory — not common on quality blades, but it happens. Check the new blade the same way you checked calibration originally: square against the blade body, not the teeth.
The other thing: use the same torque on the blade bolt every time. Overtightening can very slightly distort the blade washer seating, which introduces a tiny wobble that shows up as roughness in cuts and makes precise measurement harder. Hand-tight plus a firm quarter turn with the wrench is plenty on almost every saw I’ve worked with.
Keep a small notebook near the saw — a $2 composition book works fine — and date each calibration check. Write down what you adjusted and by how much. After a few months, you’ll see patterns. Some saws drift in one direction consistently. Knowing that your saw tends to go a quarter degree off on the forty-five-degree miter detent every six weeks tells you exactly where to look first when something starts cutting slightly off. That’s not guesswork anymore. That’s a maintenance system.


Stay in the loop
Get the latest the workshop journal updates delivered to your inbox.